
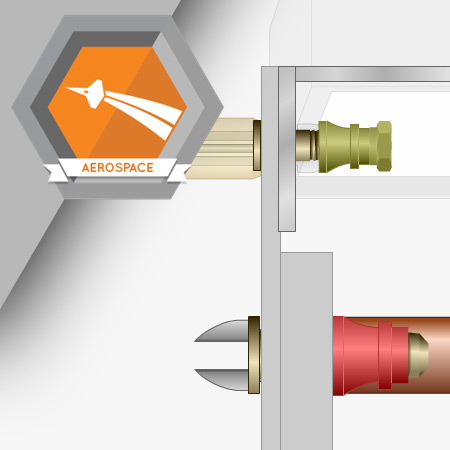
Hi-Loks are installed using a combination of tools. There are several different tools you can use to install the collar of a Hi-Lok, including manual torque tools and pneumatic torque tools.
Learning Objectives
- Install a Hi-Lok
- Use a pneumatic torque tool to install a Hi-Lok collar
- Inspect the manufactured head of an installed Hi-Lok with a gap inspection shim
- Inspect the collar of an installed Hi-Lok using a pin protrusion gauge
Language: English
Estimated Time (Hrs.): 0.9
Micro-module: No
Micro-module Series: No
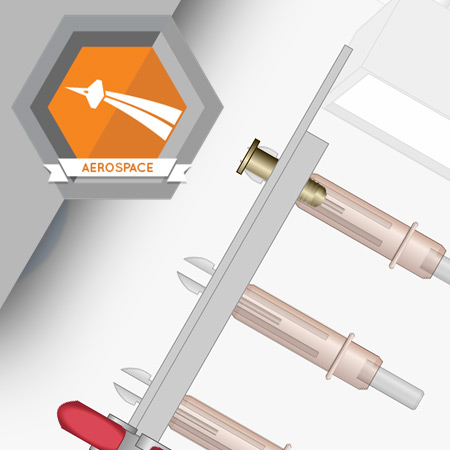
Two different size Hi-Loks are required for this assembly: 5/16 inch and 3/16 inch.
Learning Objectives
- Install a Hi-Lok
- Use a hand tool to install a Hi-Lok collar
- Inspect the manufactured head and collar of an installed Hi-Lok with a gap inspection shim
- Inspect the collar of an installed Hi-Lok using a pin protrusion gauge
Language: English
Estimated Time (Hrs.): 0.9
Micro-module: No
Micro-module Series: No

This assembly requires three vertical rows of protruding head rivets.
Learning Objectives
- Use a rivet gun and bucking bar to install protruding head rivets
- Inspect the manufactured and driven heads of the rivets
Language: English
Estimated Time (Hrs.): 0.8
Micro-module: No
Micro-module Series: No

The tools and techniques used to remove rivets differ from those used to install rivets.
Learning Objectives
- Mark the manufactured head of an installed rivet with a drill bit
- Use a drill motor and drill bit to remove the manufactured head of an installed rivet
- Use a pin punch and ball peen hammer to remove the shank of an installed rivet
Language: English
Estimated Time (Hrs.): 0.8
Micro-module: No
Micro-module Series: No
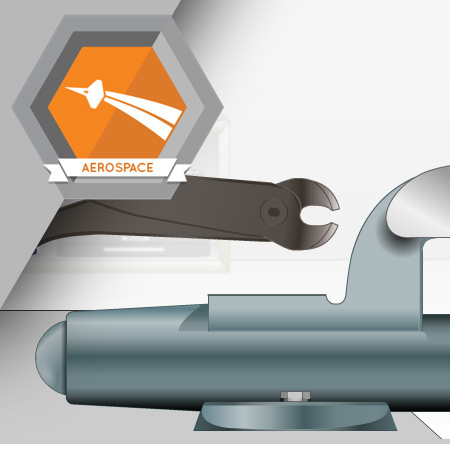
A specially designed pair of pliers called Hi-Lok collar pliers can be used to remove Hi-Lok collars.
These pliers deform the shape of the collar, loosening it from the Hi-Lok shank.
Learning Objectives
- Use a pair of Hi-Lok pliers to grip the collar of an installed Hi-Lok
- Use a pin punch and ball peen hammer to remove the shank of an installed Hi-Lok
Language: English
Estimated Time (Hrs.): 0.7
Micro-module: No
Micro-module Series: No